Teamspeak Support :: Adding a new identity for your JTS3ServerMod Bot to use
-
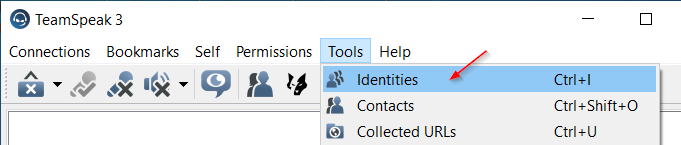
Create a new identityOpen TeamSpeak Client and click Tools -> Identities
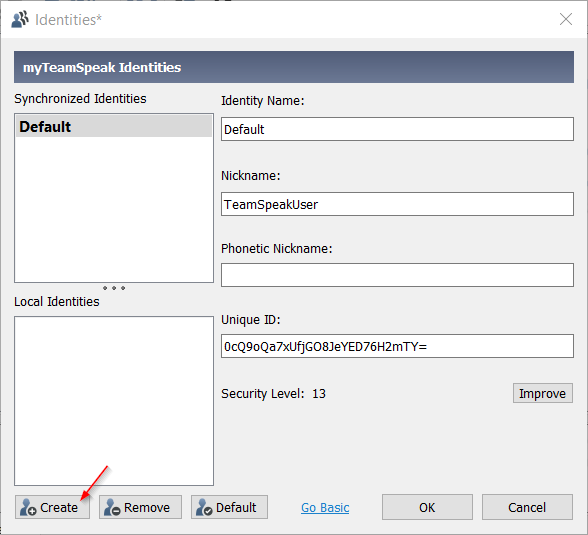
Click the Create button to make a new identity
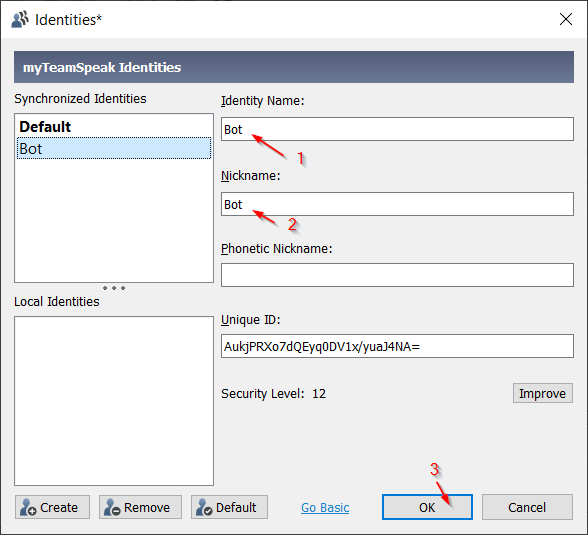
Enter the Identity Name and Nickname for the bot and press 'OK'
-
Connect with TeamSpeak Client as the new Bot identity
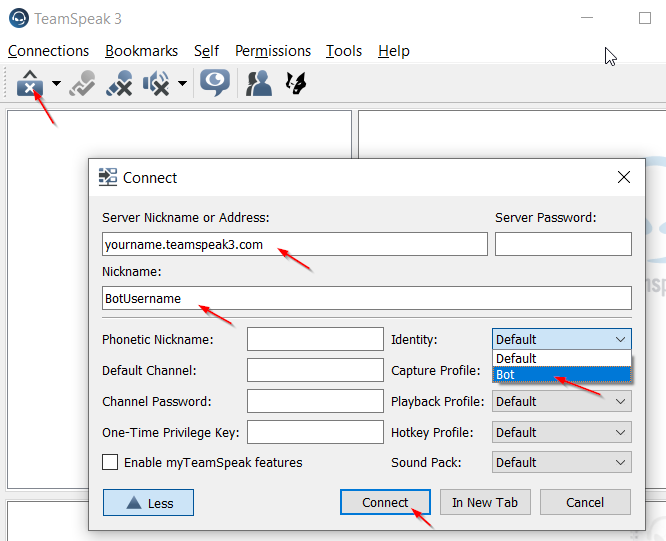
Remember to select your new Identity. -
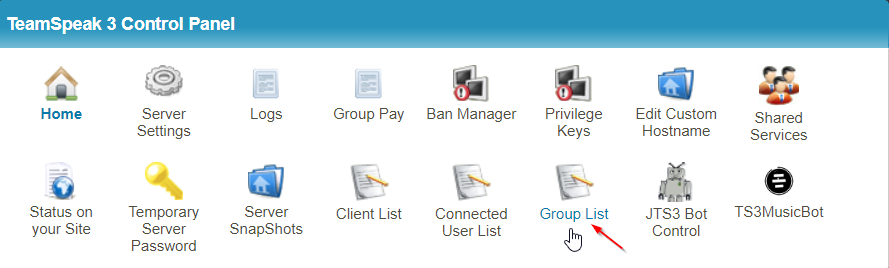
Create a JTS3ServerMod Bot groupGo to the Control Panel at https://cp.light-speed.com and click on 'Manage Service' for your Teamspeak 3 server.

Choose 'Group List' and add a new group called 'JTS3ServerMod'.

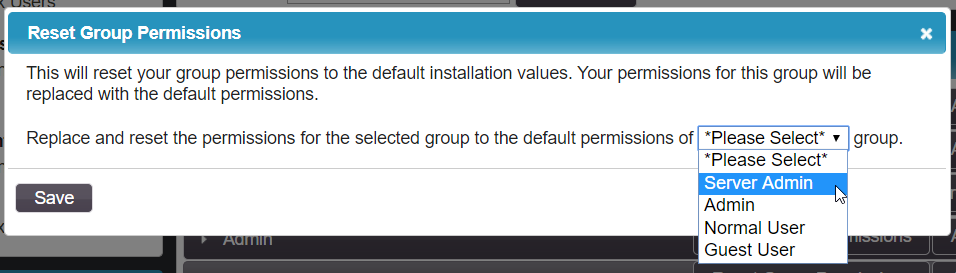
Reset the permissions for the 'JTS3ServerMod' group you just created to 'Server Admin'.

On the same control panel screen add your new bot user identity to the group.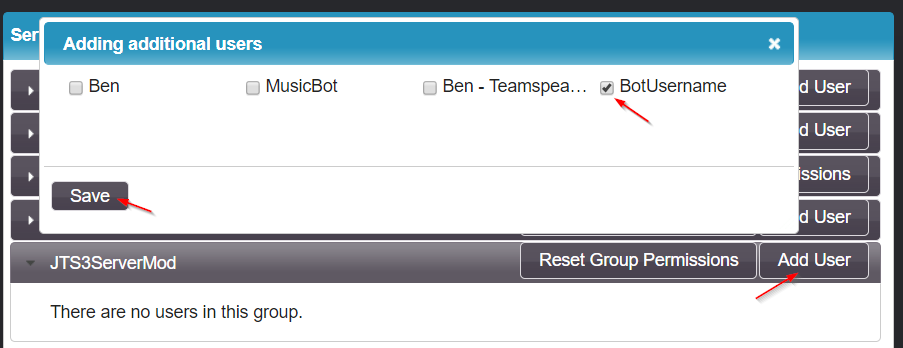
-
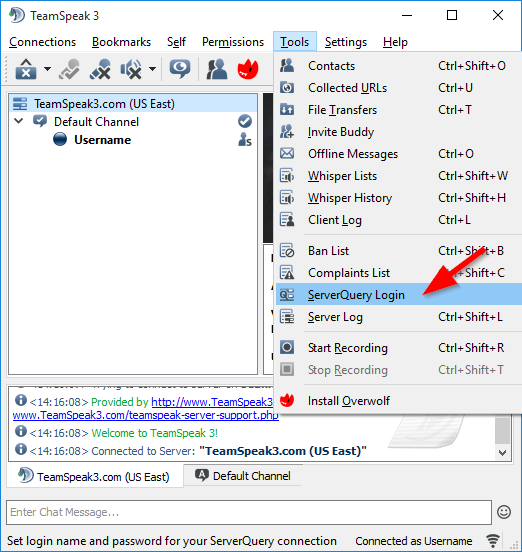
Create the ServerQuery LoginOn the TeamSpeak client you are connected as your bot identity. At the top of the TeamSpeak 3 program click the "Tools" menu then click the "ServerQuery Login" option.
Type in the server query username you wish to create and click 'OK'.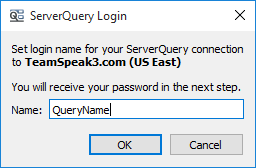
Copy and paste the generated query username and password into a blank document or notepad on your computer to use shortly. -
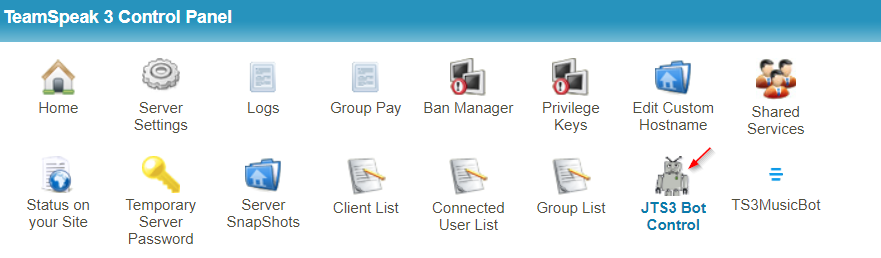
Use the new Query User on the JTS3ServerMod Bot Control PanelClick on the JTS3 Bot Icon at the bottom right of your control panel.
If you already have the bot installed you can choose 'Configure' and set the 'Server Query Account' Username and Password to the ones you copied from the previous step.
If you are installing the bot for the first time set the 'Server Query Account' Username and Password to the ones you copied from the previous step.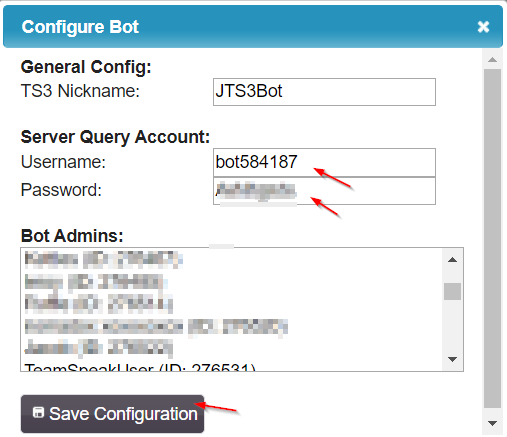
-
Start the JTS3ServerMod Bot
You may need to stop then start the JTS3ServerMod Bot for the changes to take effect.
|
Links
|
Other Services
|
Account
|


|
© 2004-2026 LightSpeed Gaming LLC